Building an outdoor waterfall can be an incredibly rewarding project, especially when you create one yourself. Not only does a waterfall enhance the aesthetic appeal of your backyard or garden, but it can also create a soothing ambiance with the gentle sound of running water. Whether you are considering a small DIY pond waterfall or a larger, more elaborate waterfall feature, constructing a waterfall can be done without breaking the bank. In this guide, we will walk you through the process of building an outdoor waterfall inexpensively while making sure it remains an enjoyable and creative experience.
Understanding the Basics of Waterfall Construction
Before starting your outdoor waterfall project, it’s essential to understand the basic components that make up a waterfall. At its core, a waterfall consists of water that flows over rocks or a structure to create a cascading effect. The materials you use, including rocks, pumps, and liners, will play a significant role in both the cost and the final look of your waterfall.
Materials You Will Need
The beauty of building your own waterfall lies in the flexibility of materials available. Here is a list of basic materials you will need:
1- Rocks and Stones: Natural stones, such as fieldstone, river rock, or flagstone, are ideal for creating a natural-looking waterfall. These can be found at most garden centers, landscaping stores, or even local quarries.
2- Water Pump: The pump is the heart of the waterfall, ensuring the water flows continuously. For a small backyard waterfall, a pump with a flow rate of 500 to 800 gallons per hour should be sufficient.
3- Liner: To contain the water and prevent it from seeping into the soil, a flexible pond liner made from EPDM (ethylene propylene diene monomer) rubber is recommended.
4- Tubing: The tubing connects the pump to the waterfall structure, allowing the water to flow from the pump to the top of the waterfall.
5- Waterfall Spillway: This is the area where the water will cascade down the rocks. A spillway can be purchased, or you can create your own using rocks.
Planning Your Waterfall
One of the most crucial steps in building a waterfall is planning. You should first determine the size, shape, and location of your waterfall. Here are some considerations to make:
1- Size and Scale: The size of your waterfall will depend on the space available and the desired effect. Smaller waterfalls are easier to construct and cost less, while larger waterfalls may require more materials and more time to build.
2- Location: Choose a location that allows for easy installation of the pump and ensures that water has a clear path to flow. Ideally, place the waterfall near a pond or other water feature to create a cohesive landscape design.
3- Waterfall Shape: The shape of the waterfall can vary based on your preferences. Some prefer a tiered waterfall that cascades over multiple levels, while others might opt for a simpler single drop.
4- Flow of Water: The flow rate of your water pump will dictate how strong the waterfall’s cascade will be. A higher flow rate produces a more dramatic effect, while a lower flow rate creates a gentler, more serene waterfall.
Step-by-Step Guide to Building a DIY Outdoor Waterfall
Step 1: Prepare the Site
The first thing you need to do is prepare the area where the waterfall will be built. Start by marking out the area and ensuring that the ground is level. Dig a hole where the pond or water basin will be located. You can opt for a small pond or just create a simple basin for the water to collect in.
If you are creating a tiered waterfall, dig the area to accommodate different levels where the water will flow from. You can use landscaping cloth to line the bottom and prevent weeds from growing.
Step 2: Install the Liner
Next, lay down the pond liner in the hole you’ve dug. The liner will hold the water and prevent it from seeping into the ground. Make sure to overlap the edges of the liner and secure them with stones or bricks to keep it in place.
For a tiered waterfall, install the liner over each level where the water will flow. Ensure that there are no wrinkles or folds in the liner, as these can impede the flow of water.
Step 3: Set Up the Pump
The pump should be placed at the lowest point of your waterfall. Make sure it is submerged in the water and connected to the tubing that will carry water to the top of the waterfall. Be sure to test the pump before proceeding to ensure it works properly and that the water flows smoothly.
Step 4: Build the Waterfall Structure
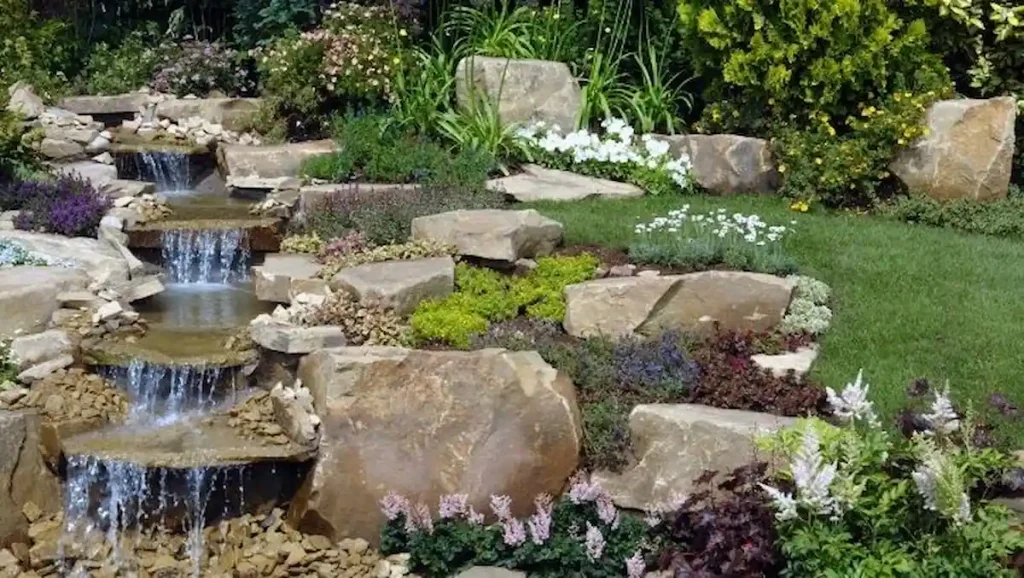
Now it’s time to start building the actual waterfall. Begin by placing the larger rocks at the bottom of the waterfall and work your way up. Arrange the rocks in a way that allows the water to flow down them, creating a cascading effect. The rocks should be placed securely, ensuring that they don’t shift over time.
For a more natural look, use different-sized rocks and allow them to fit together in a random pattern. Don’t forget to create small pools or basins where the water will collect before moving to the next level.
Step 5: Test the Waterfall
Once you’ve arranged the rocks and completed the waterfall structure, it’s time to test the water flow. Turn on the pump and check if the water flows smoothly down the rocks. If the flow is too strong or weak, adjust the pump settings until you achieve the desired effect.
Ensure that the water circulates properly and that no water is leaking out of the waterfall structure. If you notice any leaks, use additional rocks or a sealant to cover the gaps.
Step 6: Add Final Touches
After confirming that the water flows as intended, you can add finishing touches to your waterfall. You can plant aquatic plants around the base of the waterfall to enhance its beauty. For example, water lilies or moss can add a natural look to your pond. You may also want to add fish or decorative elements to the pond area to make it more lively and attractive.
Consider adding a few LED lights around the waterfall to make it stand out at night. This adds an enchanting effect and can transform the space into a serene retreat during the evening hours.
Cost-Effective Tips for Building an Outdoor Waterfall
Building a waterfall on a budget doesn’t mean sacrificing quality. Here are some cost-effective tips to help you save money on your project:
1- Use Local Rocks: Instead of purchasing expensive rocks from a store, consider sourcing them locally. Check construction sites, local quarries, or ask friends and neighbors if they have any leftover stone or rock that you can use.
2- Repurpose Materials: Repurpose materials from other landscaping projects or even old garden features to build your waterfall. This is a great way to save on costs while giving new life to existing materials.
3- Build a Small Waterfall: A smaller waterfall requires fewer materials and is easier to install. Consider starting with a modest DIY pond waterfall and expanding it later if desired.
4- Look for Deals on Equipment: Shop around for deals on pumps, liners, and tubing. Many online retailers offer discounts and sales, especially during the off-season. Additionally, check secondhand stores or online marketplaces for gently used equipment.
5- DIY Over Pre-Fabricated Kits: While pre-fabricated waterfall kits may seem convenient, they can be expensive. Instead, consider building the waterfall yourself using natural materials.
Maintaining Your Outdoor Waterfall
Once your outdoor waterfall is complete, it’s important to maintain it to ensure that it continues to function properly. Regular maintenance includes checking the pump for blockages, cleaning the filter, and removing debris from the water. Additionally, you may need to replace the pump or other equipment over time if it shows signs of wear and tear.
To keep your waterfall looking beautiful, consider periodically cleaning the rocks and liner to remove algae and dirt buildup. You can use a soft brush or pressure washer to clean the stones and keep the water flowing smoothly.
Conclusion
Building an outdoor waterfall is a rewarding and creative DIY project that can transform your garden into a tranquil oasis. By following the steps outlined in this guide, you can construct a beautiful and functional waterfall that enhances your outdoor space without spending a fortune. Remember to plan your project carefully, choose affordable materials, and take your time to ensure that your waterfall is both visually appealing and functional. Happy waterfall building!
Want to take your outdoor space to the next level? Discover beautiful landscaping solutions at Dreamscapes Florida.